
This Homemade Flaky Pie Crust Recipe came straight from my Grandmother and turns out perfectly every time!
Tender, easy, and very flaky, I’ve been making this Homemade Flaky Pie Crust Recipe since I made my first pie at the age of 10. While I won’t comment on how many years that actually is, rest assured it’s been thoroughly tested.
Everyone has an opinion on pie crusts. Lard, butter, oil, shortening or even a combination.
This special and unique combination of shortening, an egg, and a tablespoon of vinegar consistently, time are time, produces and easy, no-fail, tender and flaky crust. I was going to try and find some collaborating research to support why my slightly odd version is the best-est, most flakey, easiest etc but here is what it really comes down to.
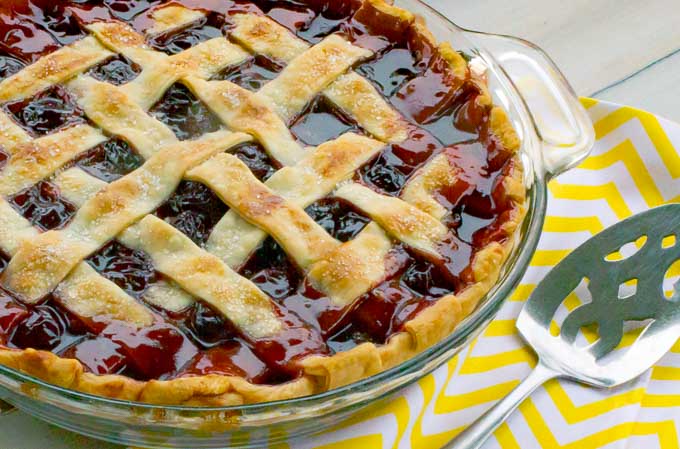
This recipe has been working for my family for 3 generations. It’s the only crust recipe I ever use, it’s perfect every time, and I’ve made approximately a bazillion pies, like the Cherry Pie with Homemade Filling below. That’s it. That’s my supporting evidence.
How to make Homemade Flaky Pie Crust
Start by stirring together flour, salt, and a pinch of baking soda. Add shortening and cut it into the flour using a pastry bender. I’ve heard that it can be done with sturdy forks or 2 knives, but personally have not tried that technique.
After 2 – 3 minutes the mixture should resemble course crumbs and there should not be any large clumps of shortening remaining.
Whisk together an egg, 1 tablespoon of vinegar, and 5 tablespoons of water. Add to the shortening crumbs and stir the mixture together until it is incorporated and forms a ball of dough, but don’t keep mixing past this point.
Turn the ball of dough out of the bowl onto a floured surface.
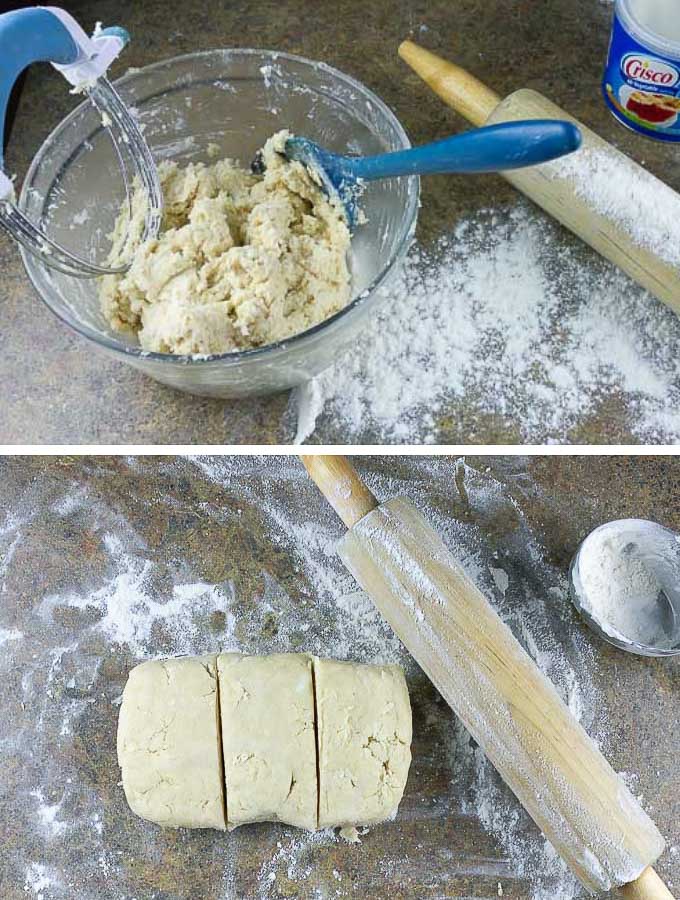
Shape the ball of dough into rectangular brick and cut it into thirds if using a 9″ pie plate. This recipe makes three 9″ crusts or two 10″ crusts.
If you will not use them all, wrap any unused dough portions in plastic wrap and a freezer bag and they will keep well in the freezer for up to 6 months or in the refrigerator for a week.
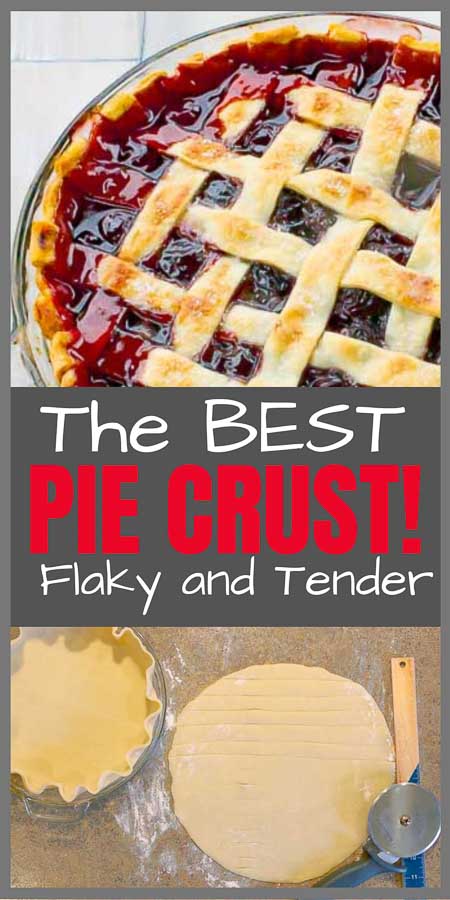
Roll out the dough using a flour dusted rolling pin to roughly 1″ wider then the pie plate.
Use a flour dusted metal spatula to flip half of the crust over. This makes moving from the counter to the pie plate much easier.
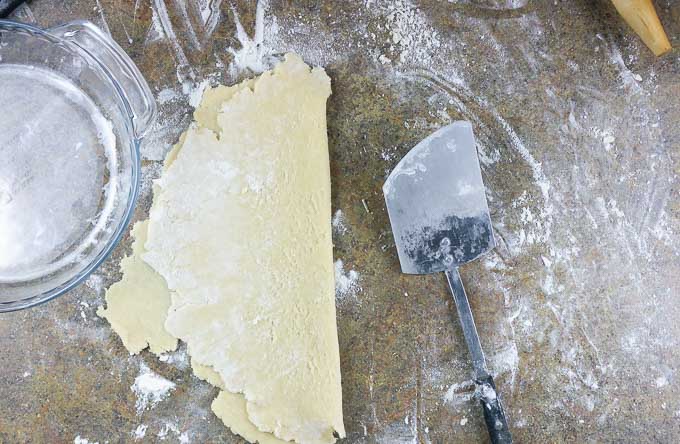
Trim any excessively long edges of pie crust if necessary.
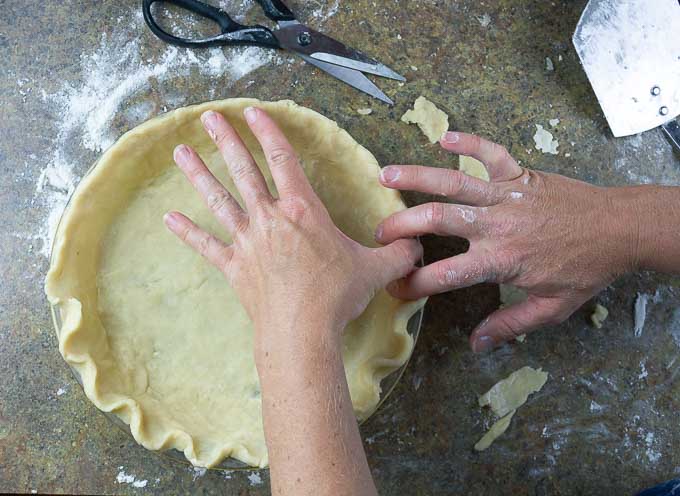
For a single crust, use a pinch and tuck to shape an easy scalloped edge.
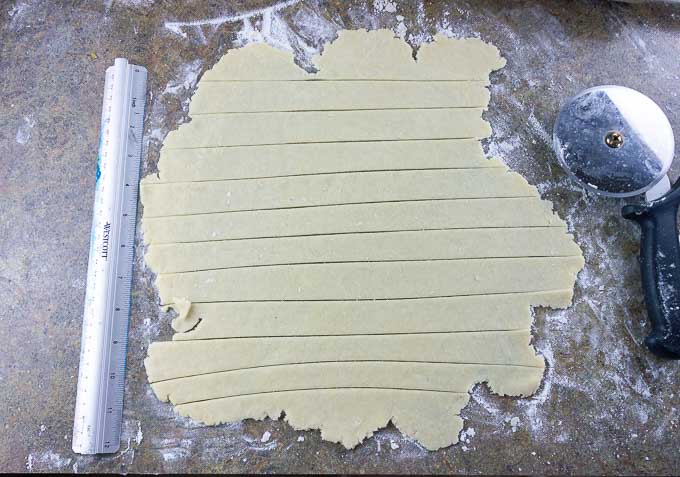
For a double lattice top crust, roll out a second crust and cut into 10 consistent width strips. Feel free to use a ruler if you are particular about the width. I usually use about 3/4″ of an inch.
Space out 5 strips of dough equidistant from the next vertically across the top of the pie. Lifting strips as needed to weave a lattice, lay 5 strips horizontally.
Trim and tuck the edges into the bottom crust and bake as directed with your pie recipe.

PRO TIPS
- Chill dough balls in the refrigerator for 30 minutes or freeze for 15 minutes to make less sticky and easier to work with.
- Makes three 9″ crusts or two 10″ crusts.
- Freeze unused crust dough tightly sealed for up to 6 months.
- Once the dough is combined, do not continue to work it, so that it stays tender.
For another great resource on all your pie crust questions, check out this article by Food52.
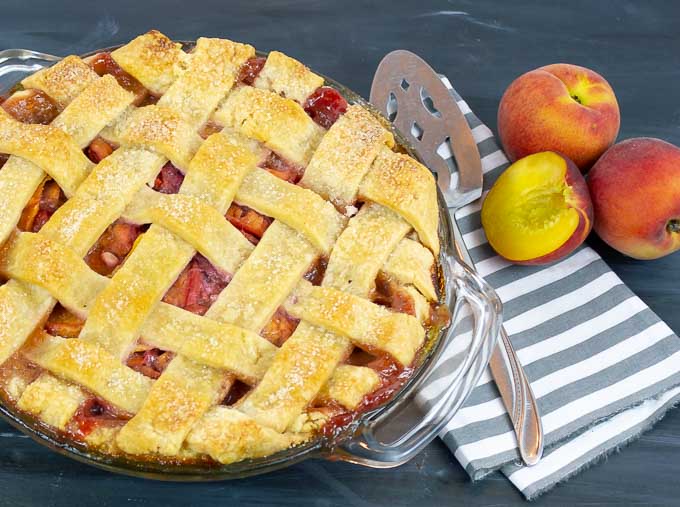
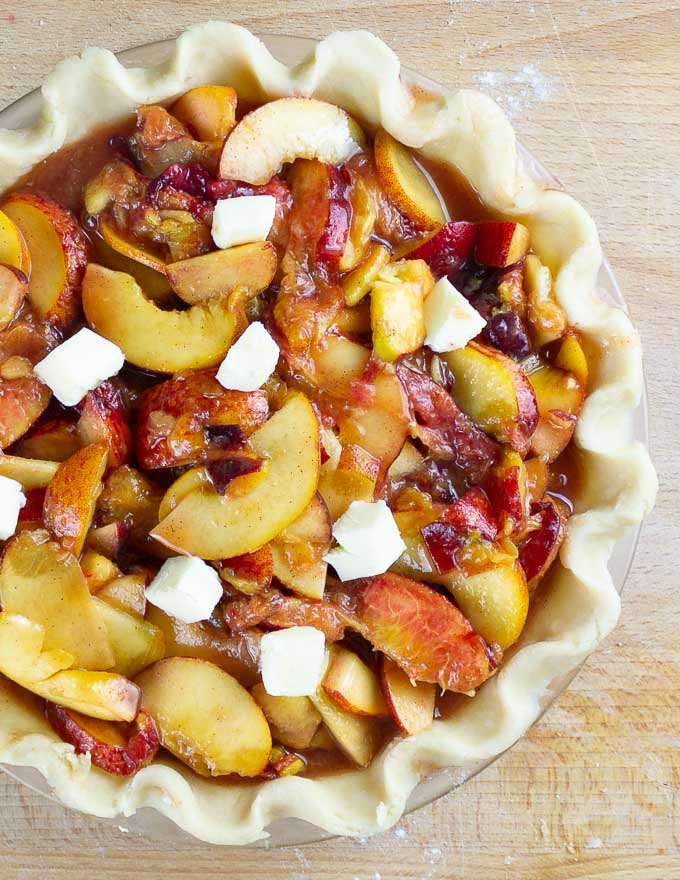
If you love pie as much as I do, make sure to try my Cherry Pie with Homemade Filling, Peach Crumble Pie, or the Fresh Lattice topped Peach Pie pictured above .
I LOVE hearing from you! Leave me a note, question, or review below.
FOLLOW me on Pinterest and pin this now to save for later.

Homemade Flaky Pie Crust Recipe
Ingredients
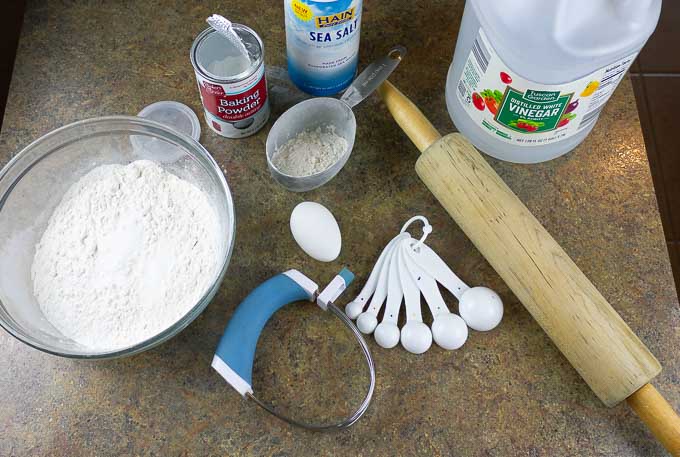
- 3 cups all purpose flour
- 1.25 cups vegetable shortening
- 1 egg – lightly beaten
- 5 tablespoons water
- 1 tablespoon white vinegar
- 1 teaspoon salt
- 1/2 teaspoon baking powder
Instructions
- Add the flour and shortening to a medium size mixing bowl.
- Using a pastry blender, cut the shortening into the flour mixture until it resembles course crumbs and there are no large clumps of shortening remaining.
- Add the egg, water, vinegar, salt, and baking powder and stir until incorporated.
- Turn out the dough onto a flat, floured surface.
- Form the dough into a rectangular brick and divide into 3 equal portions.
- Wrap each portion in plastic wrap and refrigerate for 30 minutes or freeze for 15 minutes.
- Place one of the chilled dough portions onto a floured, flat surface.
- Roll out the crust with a flour dusted rolling pin until it is about 1" wider then the pie plate.
- Using a metal spatula or other thin, flat implement dipped into flour, flip half of the crust over to make moving into the pie plate easier. See above photo.
- Fill crust with desired filling.
- For a single crust, use 3 finger tips to create a scalloped edge by pinching and tucking. See above photo.
- For a lattice top crust, roll out a second crust following the above steps.
- Cut the crust into 10 similar width strips.
- Create the lattice by laying 5 strips equidistant apart vertically.
- Lay the remaining 5 strips equidistant apart horizontally, lifting the vertical strips as needed to create the under and over lattice effect. See above photos.
- Bake as specified in the pie recipe.
Notes
Nutrition

Mother, Gardener, Book Devourer, Weber Kettle Nerd, and Food Obsessor. I love being inspired with fresh, seasonal ingredients and relish every opportunity to elevate my home cooking. Join me!


Leah
This is the most amazing recipe. My man, who is very picky and all about his sweets said that he has never liked a pie crust as much as he likes this one. Thanks for sharing!!
Jennifer Grissom
Leah, I’m so glad he liked it! Thanks for letting me know.
Shelby
What temperature do you bake this at? It seems to be missing from the recipe.
Jennifer Grissom
Hi Shelby. The time and temp is going to depend on the filling. Ideally, the pie recipe should have the information. If you are making my Homemade Cherry Pie for instance, it is 375 degrees Fahrenheit for about 55 minutes.
B
Can you subsitute butter for the shortening? I know it probably won’t be as flaky – just wondering if you’ve tried it and with what results. Thank you for the recipe!! I also made your homemade cherry pie filling but added huckleberries to it. Really looking forward to eating it tonight!
Jennifer Grissom
Hi B. I have not tried this recipe with butter, but if you do, let me know how it turns out. The cherry pie filling with huckleberries sounds amazing!
Lynn
I tried your peach pie recipe yesterday, with your grandmother’s crust. It was absolutely a hit! I found the dough a little hard to work with – very fragile. When it was baked, however, it was so flaky, tasty and light that I didn’t mind that it was a little difficult. Thanks for sharing!
Jennifer Grissom
Hi Lynn! Thanks for the awesome review! My two suggestions if the crust seems overly fragile would be it’s possibly a smidge too dry. A few sprinkles of ice cold water, gently worked into the crust can make all the difference. My other suggestion would be, if the crust is overly warm, but not crumbly, toss it (wrapped in plastic wrap) in the freezer for a few minutes and this can make rolling it out a little easier.
Nola Jenzen
This is the same recipe my family has always used. Our family background is Irish. The vinegar makes all the difference. Butter tends to make the crust soggy after a day (if you have pie left over the next day!) I’ve never been a fan of butter pie crusts, They don’t seem to have the same crispness to the crust as shortening does. However, in my family the recipe has been modified to use Crisco (regular not butter flavor) instead of the original lard.
Jennifer Grissom
I agree! Don’t get me wrong, I LOVE butter, but for pie crust, shortening just performs better! Thanks for the feedback, Nola. And I love hearing that this is an old family recipe of yours as well!
Cam
I don’t usually write reviews but this recipe is worth it. I used butter and a little more water. This crust was so good. Easy to work with and delicious.
Anne
I made this with gluten free flour, and used butter instead of shortening (since gluten free flour needs a flavor boost as it is not as tasty as regular flour). It was delicious. I did chill it for about 30 minutes before rolling. I would not do that next time when using gluten free flour, as it made it crack quite a bit as I was rolling it (a frequent occurrence with gf flour as it has no gluten to give it stretch). Best gf crust I have found so far, and I’ve been baking gf for 18 years! Thank you for sharing!